-
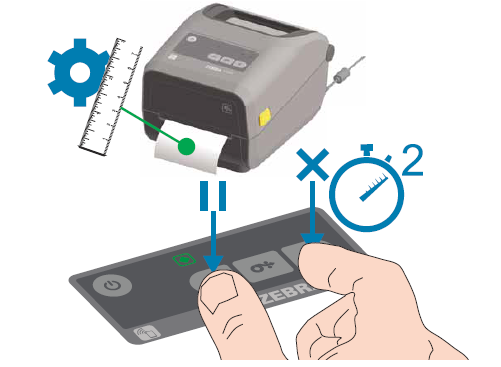
Make sure that the media and ribbon cartridge (if printing in thermal transfer mode) are properly loaded in the printer and that the top cover of the printer is closed.
-
Press the POWER button to turn on the printer
-
When the printer is ready, press and hold the PAUSE and CANCEL buttons for two (2) seconds, then release them. Refer to the following image:
-
The printer will measure some labels and adjust the media detection levels.
After the initial calibration for a specific media has been completed, no additional calibration will be required each time the media is replaced. The printer automatically measures the media to adjust small variations in media features during printing. By pressing Feed (Feed) one or two times after a new roll of media (same lot) is was installed, the labels will be synchronised. So the printer is ready to continue to print
-
Make sure that the media and ribbon cartridge (if printing in thermal transfer mode) are properly loaded in the printer and that the top cover of the printer is closed.
-
Press the POWER button to turn on the printer
-
When the printer is ready (Green Fixed Green), press and hold the START and CANCEL buttons for two (2) seconds, then release them.
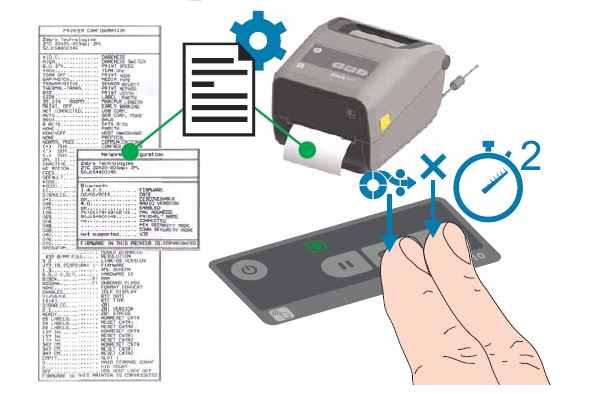
Print Test with Configuration Report Including Machine and Network Configurations